 |
Chrysonbon makes
a great vanity set. It
has lots of little pieces,
just about everything
you could imagine for
a vanity tray. These are
available for purchase
on my website. See bottom
of page for link.
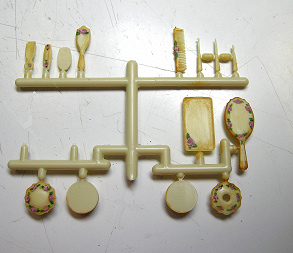
While they are very plain
to look at right out of
the package, they are
wonderfully detailed little
castings, and in perfect
scale. They can be made
to look just stunning
with a bit of work...
I think that the color
of the pieces looks just
like the old celluloid
vanity pieces!
Lets' make them even
better.
First, I find it lots
easier to leave the pieces
connected to the plastic
stem as I work. I can
hold on to the entire
set and work without needing
tweezers or worrying about
where to grab hold when
things are wet. If you prefer to remove
them all first, you certainly
may.... just be sure to
keep track of them! They
are easily lost in the
carpet!
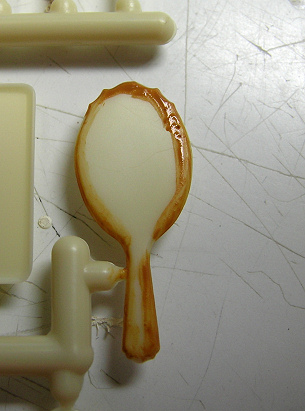
Mix a small amount of
brown acrylic paint with
stain and antiquing medium.Apply it around the edge
of your piece as shown
here using a small brush.
|
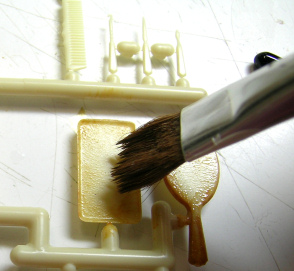 |
Then, quickly take a
larger, very soft brush
and pounce up and down
on the paint, blending
it in from the edges toward
the center of the piece.
You do not want to cover
the entire piece, just
feather the paint so that
it is darker around the
edges and lightens as
it moves toward the center
of the piece.
|
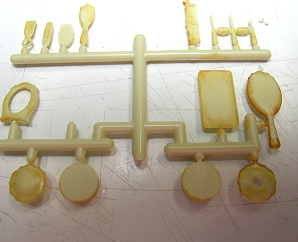 |
This picture
shows all of the piece in
my set with the brown antiquing
around the edges. For the
bases of the powder jars
I also antique at the bottom
edge, feathering up toward
the top of the jar. |
 |
You will need a dark
rose and light pink acrylic
paint for your roses.
I can hear you groaning
way over here!!! Wait,
don't panic. These are
so small, that it doesn't
take much of anything
at all to look like a
rose..
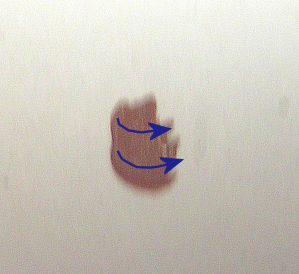
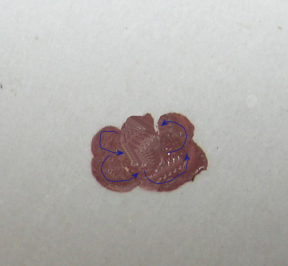
These pictures are to
show you the strokes I
used. I did them bigger
and added arrows so you
would be able to see what
I had done.
The first stroke is downward
and then curving to the
side. This is the center
of the rose.
|
 |
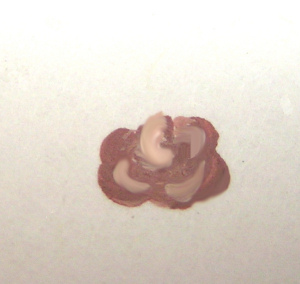
Around that center are
four little C's that make
petals.
Yes, I know, it looks
like a big blob....
Just have some patience.
And remember, you will
feel better when YOURS
look like blobs knowing
that they all start out
that way!
|
 |
Use a toothpick or even
tinier brush and load
it with the lighter pink.
Make accents through the
center and petals as shown
here.
This is a bit exaggerated
so that I could get it
to show up in the photo.
When you do yours, it
will be smaller, and the
two colors will blend
together more as you stroke
through the paint.
|
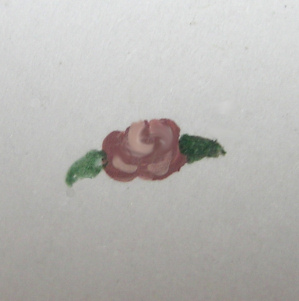 |
Load your brush with
dark green paint and put
the point right next to
the rose. Make a dot,
and then pull it away
into a little comma with
a point on the end. Simple
leaf.
You can use your lighter
green to accent the top
edge of the leaf.
Now, if you are a tole
painter, then you will
know how to condition
your brush and side load
it using two colors at
once etc. If you have
those skills, then by
all means use them. This
is not a tole painting
course, so I am only showing
you the very simplest
way that anyone can make
something to represent
a rose......
|
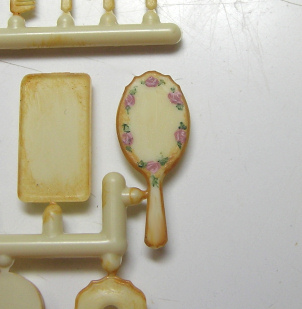 |
And when they
are painted around your
mirror back, look how lovely
they look!!! |
 |
I put a rose on the brush,
comb, and corner of the
tray. I also put them
on the ends of the nail
buffer, and around the
edges of the lids for
the hair receiver and
powder/jewelry box. Also,
paint one on the front
of each jar bottom.
When the are all completely
dry, you can mist them
with a light coat of your
acrylic sealer to protect
your beautiful paint job.The
carefully cut each piece
off the plastic stems
with a sharp xacto knife,
cutting right up against
the pieces so as not to
leave any lumps or bumps.
Touch up where the pieces
were cut off with the
brown paint if necessary.
Oh Almost forgot! The
small oval picture frame
gets a rose painted at
the top. The rectangular
frame, I choose to paint
solid gold.
|
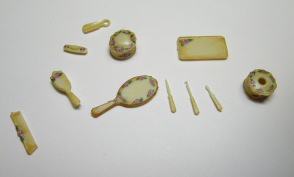 |
Here is a
picture of our dried vanity
pieces all ready to be embellished.
You can take these pieces
and arrange them on a vanity
in any order you wish. Or
you can use them as a starting
point and embellish them
to make a much more elaborate
setting. |
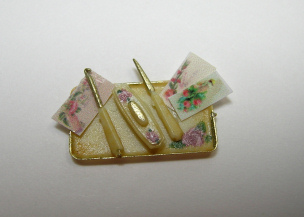 |
I use them
small painted tray to hold
the buttonhook, nail file
and nail buffer. I glued
them down, and then printed
and cut some small calling
cards glued them in and
around on the tray as shown
here. |
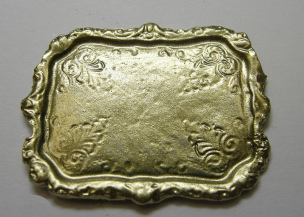 |
Trays like
this metal one are available
at most miniature stores
and online suppliers. This
one was originally silver
in color, so I applied a
couple of layers of gold
metallic paint and then
a clear sealer. |
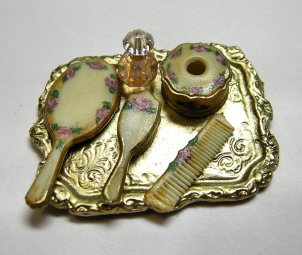 |
Start any arrangement
with the largest pieces
first. In this case, I
positioned the mirror,
and hair receiver first,
then added the brush comb
and a perfume bottle.
As the tray does not
have enough room for ALL
of the vanity set pieces,
I decided to make a jewel
box out of the powder
jar.
|
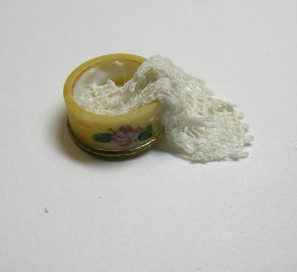 |
This is the base for
the powder jar.
Start by draping a tiny
piece of lace out and
over the side of the jar.
Remember you want your
pretty rose right in front,
so drape the lace to the
side of your painting.
Glue it down well.
|
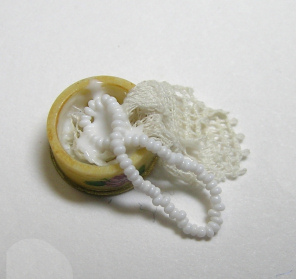 |
Apply a good amount of
glue to the inside of
the jar.
Drape a strand of beads
so that they are also
spilling out of the jar.
Don't those beads look
huge in the photo... and
so small when you are
handling them!! They are
size 24 antique glass
beads which used to be
used on beaded purses!
|
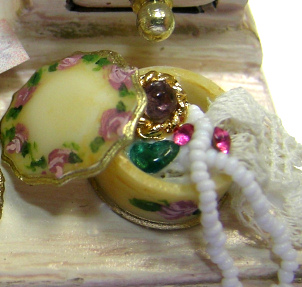 |
A couple of vintage crystals
will look just like a
pair of earrings when
you tuck them into the
box. Add other stones,
and findings.
Then take the lid and
tip it off the box. Find
a nice position for the
lid and then glue it into
that position.
|
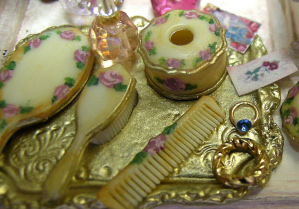 |
A large twisted
jump ring makes a lovely
bracelet. I put mine on
the main metal tray, along
with a tiny jumpring and
a crystal that now become
a sapphire ring. I also
added a couple calling cards
to the tray, and a little
perfume bottle |
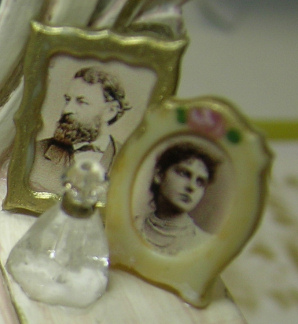 |
Little antique
photos in the frames are
a lovely detail. |
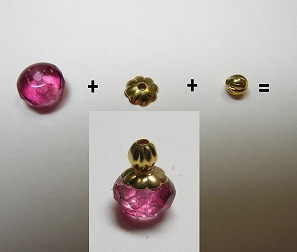 |
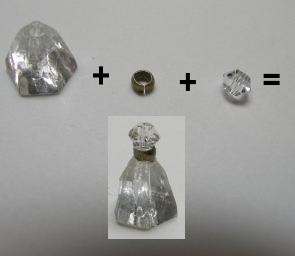
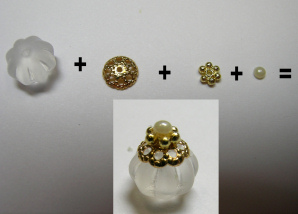
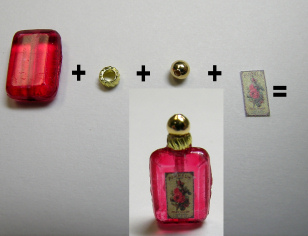
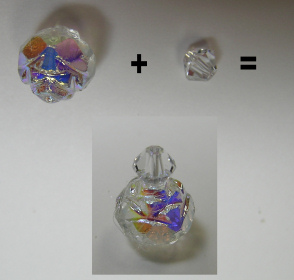
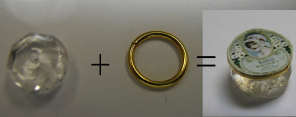
If you want to add some
sparkle, just combine
crystal beads and metal
findings, bell caps and
beads to make lovely perfume
bottles. Do not use zap
a gap or other crazy glue
type adhesives, as they
will cloud your beautiful
crystal beads.
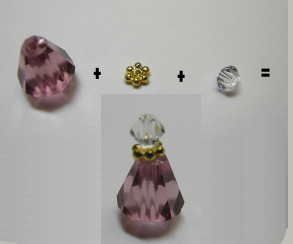
Below are other suggestions
for bead and finding combinations.
Let your imagination go
wild!
|
 |
|
|
|
 |
 |
|
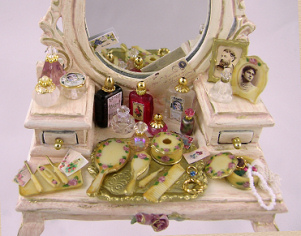
Here are all
of the items that I have
shown you arranged on an
inexpensive vanity which
has been refinished. With
just a few little items
and some imagination, you
can make a filled vanity
that is just stunning! |